Soldering is the traditional and most economical method of wire termination. The soldering process involves melting and cooling a lead or tin alloy into solder cups to bond a wire conductor (either solid core or stranded) to a contact. Solder terminated connectors are recommended for all general-duty and industrial applications that require reliable signal and power connections. The primary benefit of soldering is its affordability. Unlike crimp terminations that require specialized tools, nearly any size wire and solder contact can be terminated with a basic soldering kit.
Basic Connector Soldering Instructions
Step 1
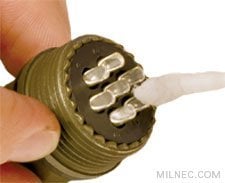 To ensure the cleanest, strongest solder bond, remove impurities by lightly brushing or swabbing solder cups with alcohol before terminating any wires.
Step 3
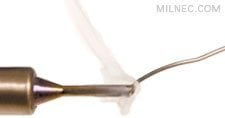 Lightly tin the tip of the soldering iron. Tinning involves melting a light coat of solder on the tip of the soldering iron to enhance heat conductivity. Gently shake off any excess solder or wipe on a wet sponge, as only a thin coat is required. Be sure to shake away from your body and face.
Step 5
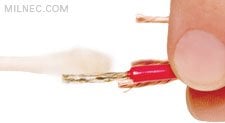 Once cooled, lightly wipe your tinned wire with alcohol to remove flux residue or other impurities. Wipe off the tip of the iron with a damp sponge. Then tin the tip of your clean soldering iron once again (step 3).
Step 7
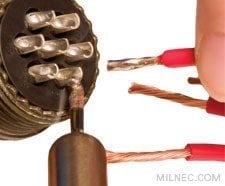 Insert piece(s) of pre-cut solder into the soldering cup. With your pre-tinned wire in one hand and the soldering iron in the other, touch the tip of the iron to the outside of the cup to melt the solder strip. Do not touch the iron to the solder directly. Heat the solder cup instead. We recommend using a third-hand tool or vise to help hold some of your materials.
Step 9
 Swab your termination with alcohol to remove flux residue and other contaminants. Repeat Steps 1-9 for the rest of the necessary terminations. When you are finished, double check all your terminations, connect your backshell accessories, and test your connection.
Step 2
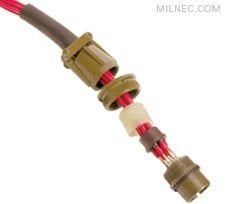
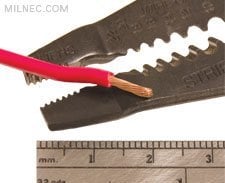 Prepare your wires by cutting them to length and stripping the proper amount of insulation from the ends (see p. 27 for HS Series and p. 50 for PS Series). Twist stranded wires together to create a single piece to solder. Be sure to label each wire according to contact placement (color coding works best) and to string the rear connector accessories along the wires.
Step 4
 After tinning your soldering iron tip, tin the tip of your stripped wire. Do this by touching the tip of the iron and the solder to the stripped wire to heat it. The iron and solder should be in close proximity to each other but should not touch. The solder should spread quickly and easily over the metal by wicking action. Rotate the wire to ensure even coverage.
Step 6
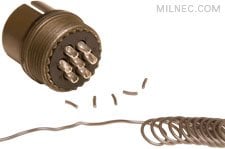 Cut a piece of rosin-core solder the inside length of the soldering cup. The easiest way to measure is by laying the uncut solder wire into the cup and slightly bending it backwards over the edge and cutting at the bend. You may choose to pre-cut all of your solder pieces before doing any actual soldering.
Step 8
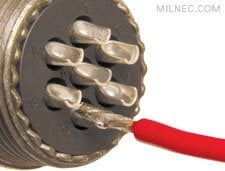 When the solder melts, quickly insert the wire into the solder cup so that the wire tip is touching the bottom and the rest of the wire is laying flat against the side. Hold the wire in place and remove the iron to let the solder cool. Lightly tug on the wire to test the solder joint.
Soldering Tips & Tricks
Don’t Solder Yourself Into a Corner
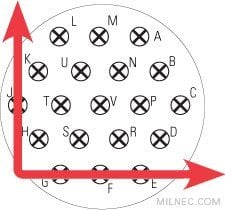 For high-density inserts, it is recommended to begin soldering from the bottom, working your way up while working across left to right. This ensures good visibility while soldering.
Avoid Cold Solder Joints
A cold solder joint is brittle and prone to physical failure. It may also have a very high electrical resistance, which can affect the operation of the circuit or cause it to fail completely.
Cold solder joints occur when the temperature of the solder cup is at a different temperature from the molten solder. Another common cause for them is moving the wire before the solder has completely cooled.
For this reason, you always want to heat the solder cup and let the heat transfer melt the solder. This ensures both the cup and the solder heat and cool evenly, forming a perfect solder joint. Remember to never melt the solder directly with your soldering iron tip.
Use the Proper Equipment
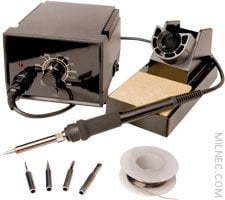 Milnec’s soldering station kit provides a complete solution for professionally terminating every Milnec PS or HS Series connector to stranded or solid core wire.
Features & Benefits
- Temperature range 392°- 896°F (200°- 480°C)
- Adjustable temperature control dial with lock/set screw
- Idle temperature stability of ±1.8°F (1.0°C)
- Ceramic heating element and senor ensure rapid heat- up temperature (30 seconds) and fast thermal recovery
- Celsius or Fahrenheit temperature setting
- Slender iron handles are insulated and ergonomically designed for ease and comfort
- ESD-safe design suitable for controlled environments
- 5 interchangeable tips suitable for connector solder contacts ranging from #0 to #20


